In this fourth part of our Silent Hill 2 Walkthrough, which presents a step-by-step guide to completing the entire game on PS5, including Collectibles, we'll be covering Brookhaven Hospital. You get here after following Laura through the roads and buildings of West South Vale.
This Walkthrough is intended for a playthrough where the Combat Challenge and Puzzles Challenge are both set to the Standard option. For more information covering Combat and Puzzles difficulty options, click the link. This page offers a full guide through the location, from the moment you enter until you reach the Historical Society. This also includes how to solve the Hand puzzle in the Director's Office, how to open the Safe in the Director's Office, and how to solve the Chained Box puzzle.

Immediately after entering Brookhaven Hospital, before the second set of double doors, take a right into a small office to find your first set of Shotgun Shells in a drawer. There's then an open cabinet on the wall with a set of instructions, hinting that the Shotgun is somewhere in the building. Continue along the main path into the Lobby and you'll spot the Brookhaven Hospital 1F, 2F, and 3F Maps on the wall opposite. You can then head into the Reception to find Handgun Ammo in a drawer as well as a Memo for the Key Locker Note.


Next, head into the Reception Office to find a save point and a Padlock stopping you from grabbing a key. James marks it on his map, so we'll return here once we have the solution. For now, you can grab a Health Drink from the Restroom and then head east along the Lobby into the stairwell, where you'll find Laura drawing on the wall. The double doors she runs through lock behind her, so you can't actually give chase yet. Instead, return to the Lobby and head up the right-hand corridor.


To enter Exam Room 3, smash the glass with your Steel Pipe. There's a Syringe on the bed in front, then the rooms on the right contain Shotgun Shells and a Nurse's Memo.


You now have the tools to work out the Padlock code in the Reception Office. For more information, click the link:
Reception Office Padlock code revealed
For solving the Padlock code, you'll get the Basement Key. Return to the stairwell where you saw Laura and head down a floor to unlock the double doors. Immediately in front of you on the other side will be the Hospital Basement Map. Down here, run through the Pump Room to find a Generator in the Generator Room. They know how to word things correctly here, don't they?
Head south down the corridor, defeating a few enemies along the way, and enter the Boiler Room on your right to find an Empty Fuel Can in the back corner. Next, cross the corridor into the Laundry Storage and push the white clothes cart into the Laundry Room, up against the wall with the open vent at the top. On the other side is Handgun Ammo, a Syringe, and a fuel pump you can use to make a Filled Fuel Can. Return to the Generator and insert the fuel to get it running again.


This will return power to the Elevator, which in the basement, is next to the stairwell you used to get down here. You can use it to reach floor 2F, with a cutscene upon exiting splitting James and Maria up as she needs to take a lie down. In Room C3, you'll find a Health Drink and a save point. In the Restroom you'll find Handgun Ammo, then there's another box of it in Room C2. Next, head north up the corridor and around into the more open area where you'll encounter your first nurse enemy. Once it's dead, observe the Nurses Station entrance to note down a Keypad, then pick up the Staff Memo stuck to the window.


From the Nurses Station, turn around and head for the back-right corner of this area. There's a hidden crawlspace you can use to access Room L3, and then the Observation Room which has a Strange Photo on the desk.


Next, return to the main area and head south from this position into the Laundry Room to find Shotgun Shells and one of the Glimpses of the Past.


Continue south and head into Room C1. Interact with the poster, then search it to find the Memo called Interview Transcript. Doing so marks Something There? on floor 1F of James' map.


You can now enter the Director's Office. In here, you can make a save in the small room to the right, then there's a Hand puzzle on the desk and 3 Memos on the table to the right. You can also listen to an audio recording on the tape player next to the lit lamp.


Also in the Director's Office is a red curtain you can pull back to reveal another Safe puzzle. As we explore Brookhaven Hospital, we'll be on the lookout for items that help us solve the two puzzles. For now, leave the Director's Office and head left to find a nurse enemy running at you. Kill it, then run to the end of the corridor and enter Room M1 for Handgun Ammo and another Glimpse of the Past.


Next is the Women's Locker Room, where you'll find a Health Drink, Handgun Ammo, Shotgun Shells... and a Shotgun! If you interact with the teddy bear on the chair, you'll get the Bent Needle. Leave the room and head for the Nurses' Lounge next, where on the table in front of the TV you'll find the L1 Room Key. Return to the corridor and use it to enter Room L1. Inside, push the metal cart on your right up against the open vent space above the locked door and crawl through. There's a diary entry you can read on the desk, but the main path is to the right through the window and into the Utility Room. There's a small hole in the ground that James can fit through, but during the cutscene, he falls down in between the walls and ends up on floor 1F.


When you regain control, climb through the crawlspace in the wall to enter Medical Records. In here is a Health Drink, a Memo, a Glimpse of the Past, and the Marked Bracelet for the Hand puzzle.


With this room cleared, exit into the Lobby and return to floor 2F via the eastern staircase, presuming you unbolted the door previously. If not, you can use the Elevator instead. Once you're up there, you can return to the Director's Office and place the Marked Bracelet on the Hand puzzle. Next, go to the stairwell in the northwest corner of floor 2F and use it to get upstairs to floor 3F. You'll spot Laura if you look through the grate in the metal door to your right, then you can follow the corridor around to the left and into Room D2. Interact with the typewriter, then smash the glass next to Exam Room 5 back out into the corridor so you can get inside.
You can take the 1F Inner Ward Key off the desk, then head into the X-Ray Room to find the X-Ray Memo. Underneath it will be the Radiograph of a Pelvis, which for now, simply place in the X-Ray Viewer.


That's all we can do up here for now, so head back down to floor 1F and use the 1F Inner Ward Key on the locked double doors in the central corridor leading off the Lobby. Start by heading left, where in the Restroom you'll find Handgun Ammo, and in the Pantry some Mold Remover. More Handgun Ammo awaits in the Cafeteria and second Restroom. With this area swept clean, return to the double doors you unlocked previously and enter the Dayroom. Defeat the nurse, then follow the path through the back and into the Pharmarcy, where you'll find a Drain you need to use an item on to get its contents. James will mark it on your map for later.


From this room, you can actually climb out an open window into the Garden, where a group of enemies needs to be defeated. When you're free of them, you can use a crawlspace behind the wooden hut to enter it to claim some Handgun Ammo and a Syringe. Just be careful, though, because there's also an enemy inside. The main path is through the Greenhouse, where an open window allows you to slip into the Pool area. From the direction you enter, there's a grate in the floor in the back right corner that's covering the Pool Pump.


We don't have the item needed right now, but head into the Shower Room to find a Medical Tube. Head through the door and cross the corridor into the Doctor's Lounge, where a Keypad Combination Note can be found pinned to a noticeboard. Around this time, Examination Room 1 should be unlocked so return there for a Strange Photo also.


This Memo tells you how to get the Nurses Station Keypad Code, but if you need any further assistance working out, please click below:
Where to find the Nurses Station Keypad code
Once inside the Nurses Station, grab the Handgun Ammo on the left and enter the Treatment Room. There's a Memo for the Treatment Room Note on the left, then approach the bathtub surrounded by bugs to find the Moldy Radiograph. In your inventory, combine the Moldy Radiograph with the Mold Remover to get the Cleaned Up Radiograph.


Now you have the Cleaned Up Radiograph, you can return to the X-Ray Viewer in the X-Ray Room on floor 3F and finish the puzzle. For further guidance to help you solve it, click below:
Where to place all Radiographs
Solving the X-Ray Viewer puzzle provides you with the code for the Combination Lock code for Room D1:


Take this back to the Director's Office on floor 2F, as you can now solve the Hand puzzle. Refer to the page below for the solution:
Where to place Bracelets on the Hand
Your reward for solving the Hand puzzle is the Director's Storage Room Key, which can be used on the door opposite the save point in the Director's Office. In here, you'll find the Safe Button and a series of books you'll need to correctly order. For guidance on this Safe puzzle, please click below:
Where to find the Safe Button
For opening the Safe in the Director's Office, you'll earn the Rooftop Key. There's also a Memo called Safe Note in there too.


From the Director's Office, you can access the Rooftop by climbing the stairwell in the northwest corner of floor 2F and then following the single corridor on floor 3F around to the right-hand corner. Use the Rooftop Key and exit out on the roof, where you can find Shotgun Shells and another Glimpse of the Past.


Go through the double doors with light pouring out its windows and pick up the Page From a Diary off the floor for another Memo.


When you try to go back outside, Pyramid Head will surprise James and throw him through the floorboards. The action picks back up with James on floor 3F, on the other side of the locked, metal door we last saw Laura. You can hear her humming, so head down the corridor into the Hydrotherapy Room to find Handgun Ammo, Shotgun Shells, a Health Drink, and a Syringe. You can also unlock the other door so you have an easy way to get back to the rest of Brookhaven Hospital.


Return to the corridor you just gained access to and follow it into Room 13. Interact with the bloodstain in the left-hand corner for another of the Glimpses of the Past.


Return to the corridor and follow it around to find Laura. In the cutscene that follows, she lures James into a room with a boss fight inside, against the Flesh Lip. This mound of flesh will attack from the ceiling, launching itself down at you from the rafters. You can tell roughly where it is from the rumblings, creaks, and dust it produces as it moves about from the ceiling.
As you shoot and damage it, the cage surrounding the Flesh Lip will start to break. Once 3 of its sides have started protruding like pincers, it'll drop down to your level for the rest of the fight. Continue blasting it with your guns and it'll eventually die. There are some Ammo and Health Drinks around the sides of the room if you need any extra help. The Flesh Lip will die and then a cutscene follows, but it turns out there was a second Flesh Lip hiding all along. It grabs James and transports him to the Otherworld version of Brookhaven Hospital.


If you open up your map once you have control of James, you'll notice this Otherworld version features the exact same rooms and layout as the normal one, but your map has been wiped clean and everything looks even dirtier than before. Enter the Dayroom and pick the Memo up, known as Evaluation Card, Patient #3141, off the wheelchair.


There's also a Syringe and Handgun Ammo in this room, then you can leave by the door left ajar. Save your game on the left, then use the Elevator to reach floor 2F, as everything else is either locked or inaccessible from your position. In the open area ahead, you'll discover the Chained Box, which forms a large puzzle for the Otherworld version of Brookhaven Hospital. It has 3 requirements: a combination lock code, a keypad code, and a key. There's clearly a lot to this puzzle, so let's begin by searching the left-hand side of floor 2F.
Cut through the Nurses' Station to find Handgun Ammo and Shotgun Shells, then in the Nurses' Lounge you'll find more of the latter along with a Health Drink. On the far side of this room, you'll notice an overflowing toilet. To the right of it is a crawlspace you can use to access the Women's Locker Room, which houses more of the usual ammo and health supplies.


Return to the corridor by unlocking the door and take the stairwell it leads to up to floor 3F, where a Memo can be found on the operating table in the X-Ray Room, called The Procedure.


In Exam Room 4, take the Instrument of Force and use it on the mannequin's left arm next to it. Climb through the window and kill the 2 enemies found in the corridor, then head for where there should be a stairwell in the northwest corner. There isn't actually one there, but if you look at the northern wall of Room D2 from the outside, you'll find a place to break the wall down so you can enter.


In Room D1, you'll find a ladder you can use to head down into the Kitchen on floor 1F. You'll find the normal ammo and health supplies in here and the Restroom to the north, though the main route ahead is through the Storage and Medical Records area to access a gap in the wall you can fit through in the back. There's a small hole in the wall in the room on the other side, with the Key of Bliss inside. This can be used on the mannequin on floor 2F that James has marked on his map as Surgical Chair. Return to the Kitchen and take the ladder back up to use it and you'll get the Lapis Eye Key in return.


This can be used on the central keyhole on the Chained Box, but Note: inserting the key blocks your access to the area you've just searched. You can't return, so be sure you've found all the items and Memos first.
Now, we're going to explore the rest of floor 2F. Heading right, you'll find ammo and health supplies in the Restroom and Room C2 (everywhere else is locked or blocked off). Now return to the Chained Box and head directly south into the Restroom to find a metal cart you can use to climb into Room L1. You'll find further ammo supplies in here. When you're ready, climb out the window on the room's western side and cross into Room M1 to find a clock. You can interact with it to straighten the hand, and now we need to work out what number it should point to.


For now, head into Room M4 and cut through the hole in the wall into Room M5 to find a Glimpse of the Past on the eastern wall.


Head back into Room M3, where a breakable wall allows you access to Room M2. In here, you'll work out the Combination Lock code for the Chained Box. Grab the Memo in the tent for the Calendar Page.


For information relating to what to do in this room to get the Combination Lock code, click below:
A complete guide to the Chained Box puzzle
Now the Combination Lock is gone, there's just one more step to unlocking the Chained Box. Please note that just like with the Lapis Eye Key, the area you explored to get the Combination Lock code is now inaccessible.
Next up, follow the east corridor all the way around to the Director's Office. You'll notice it's locked and we don't have the key yet, but turn around and you'll spot a breakable wall leading into the Laundry Room. Smash your way inside, defeat the enemies and pick up the ammo and health supplies, then push the cupboard on the northern wall to one side. Doing so allows you to push the metal cart on your left out into the corridor and up against the wall. There's a crawlspace high up you can access opposite Room L2 to enter Room L3.


Defeat the 3 enemies inside, then go through to the Observation Room to find a Memo on the bed to your immediate left. Then, in the bedroom in the back in the bedside cabinet is a Strange Photo.


Now you have those Collectibles, approach the static TV in the Observation Room to find the Director's Office Key in front of it. Exit out into the corridor and use the key to enter the Otherworld version of the Director's Office. You'll find Shotgun Shells and a Health Drink in the small room on the left, then to the right of the ladder in the center is a Memo called Manic Scribble.


Climb the ladder up to Room 17 on floor 3F, which features a Treatment Stretcher. You can't do anything with it just yet, so search the room for supplies and then grab the Memo in the back-right corner.


Enter the corridor and defeat the enemies you find, following the red wire along the ground to a crack in the wall you can squeeze through. Turn the Generator in the bathroom on, then squeeze through the crawlspace opposite so you can quickly get back to the Treatment Stretcher. In this area, you can also crawl through a hole to grab a Memo. Turn it on and the code 9659 will appear. This is the Keypad code for the Chained Box, so return there and enter it.


James will open the Chained Box to discover there's nothing inside. However, this triggers the reveal of a portrait/statue of a woman. James takes something from her mouth, which turns out to be the -1 Elevator Button. Again, the area you were exploring previously has been blocked off, so the only thing you can do now is interact with the Elevator and place the -1 Elevator Button in the panel. Press it and head down, listening carefully to the announcer who comes on the radio. They ask you 3 questions, and while you can't answer right now, they're important for an optional puzzle later on.
When you reach the Basement, search the Kitchen Disposal Room for some ammo and health supplies, then head east into the Maintenance Room to squeeze through a gap in the wall into the Generator Room. You can head through Laundry Storage next for some Handgun Ammo (beware the enemy hiding to the right), then cut through the dedicated Laundry Room and Storage area to reach the southern end of the corridor.


Through the 2 Boiler Rooms you can go next, where in the second will be a raised open vent you can climb through to reach the Pump Room. By the hole in the wall on the table, pick up the Copper Ring. Doing so sees Maria appear, who isn't in the best of moods. She'll now join you in your search for Laura through Brookhaven Hospital. Head down the corridor and take the staircase up to floor 1F, where in Exam Room 3 you can grab a Syringe and exit out into the corridor.


All the doors are locked, so enjoy the rain and enter the Pool area, with there being a Strange Photo in the back-right corner as you enter.


Head south into the Doctors' Lounge, where in a cutscene James and Maria will open a fridge to find the Lead Ring. Having regained control, use the door to your right to enter the Locker Room, where on the bench will be the Dissociated Note.


Unbolt the door, save your game, and enter the Pharmacy to find the Decorative Box. Do you remember the questions we were asked earlier in the Elevator by the radio announcer? Here's where you input your answers. For help solving the Decorative Box puzzle, click the link below:
What's the Decorative Box code solution?
Once you've opened it and claimed your reward, head back out into the corridor and call the Elevator to take it up to floor 2F. Approach the painting/statue opposite where the Chained Box was and place the Copper Ring and Lead Ring on it. It'll turn into a door and swing open, allowing James and Maria to pass through. On the floor will be the Ominous Note.


At the very bottom of the stairs, you'll enter a red-lit corridor and Pyramid Head will chase you. Sprint away and head for the elevator at the end of the corridor. Unfortunately, however, there's a casualty: Maria is stabbed by Pyramid Head and doesn't make it. When you regain control of James, go into the Reception Office to find the Hospital Entrance Key on top of a book. James will then spot Laura running away outside, so give chase by unlocking the front double doors and heading out into the rain.


As you leave, you'll be greeted by an Otherworld version of South Vale. The path through West South Vale is entirely linear and is more of a combat challenge than anything else, pitting you against multiple groups of enemies as you explore its significantly darker streets. When you reach East South Vale, enter the campervan to save your game and pick up the Memo on your right. This marks a "Letter and Wrench" hint on your map at the American Cafe.


You can cross the chasm in the road through Happy Burger, then in Neely's Bar, there's a Glimpse of the Past on the bar and a path through to the other side of the area. Again, this path is completely linear so follow it to the question mark on your map, where a public phone will be ringing. There's nobody on the other end, but a Memo does appear when James puts the phone down. Also on the public phone is the Wrench. Afterwards, head to the Lucky Jade Restaurant and smash the window of the car on its driver's seat outside to find a Strange Photo.


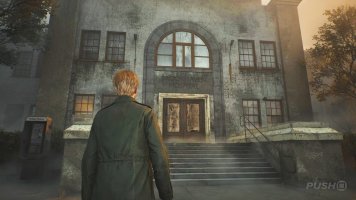
Next, head north up Neely Street and use the Wrench on the gate next to the save point to pass through. Follow the long dark tunnel into Rosewater Park, where you'll need to find a path through to the other side — where the circle on your map is essentially. There, you'll encounter Angela again. After the cutscene, use the interactive prompt at the foot of the statue to get the Historical Society Key from a metal box. Leave Rosewater Park and head west up Nathan Avenue to find the Silent Hill Historical Society. Use the key to unlock the front door and head inside, where our Silent Hill 2 Walkthrough continues. On your way there, though, head to Room 106 at Jacks Inn and interact with the prompt on the back wall for a Trophy.


Did you find our Walkthrough covering Brookhaven Hospital in Silent Hill 2 and all its Collectibles useful? Our Silent Hill 2 Walkthrough continues in our Historical Society Walkthrough, and we have even more guidance and information in our overall Silent Hill 2 guide.
This Walkthrough is intended for a playthrough where the Combat Challenge and Puzzles Challenge are both set to the Standard option. For more information covering Combat and Puzzles difficulty options, click the link. This page offers a full guide through the location, from the moment you enter until you reach the Historical Society. This also includes how to solve the Hand puzzle in the Director's Office, how to open the Safe in the Director's Office, and how to solve the Chained Box puzzle.
Silent Hill 2: Brookhaven Hospital - All Collectibles: Memos, Glimpses of the Past, Strange Photos
Memo #1: Key Locker Note
Having entered Brookhaven Hospital and grabbed the maps from the Lobby, take a left into the Reception and you shall find this Memo pinned to a noticeboard.


Next, head into the Reception Office to find a save point and a Padlock stopping you from grabbing a key. James marks it on his map, so we'll return here once we have the solution. For now, you can grab a Health Drink from the Restroom and then head east along the Lobby into the stairwell, where you'll find Laura drawing on the wall. The double doors she runs through lock behind her, so you can't actually give chase yet. Instead, return to the Lobby and head up the right-hand corridor.


To enter Exam Room 3, smash the glass with your Steel Pipe. There's a Syringe on the bed in front, then the rooms on the right contain Shotgun Shells and a Nurse's Memo.
Memo #2: Nurse's Memo
Smash the glass next to the door for Exam Room 3 on floor 1F, then head into the room on the right to find this Memo in the desk.


You now have the tools to work out the Padlock code in the Reception Office. For more information, click the link:
Reception Office Padlock code revealed
For solving the Padlock code, you'll get the Basement Key. Return to the stairwell where you saw Laura and head down a floor to unlock the double doors. Immediately in front of you on the other side will be the Hospital Basement Map. Down here, run through the Pump Room to find a Generator in the Generator Room. They know how to word things correctly here, don't they?
Head south down the corridor, defeating a few enemies along the way, and enter the Boiler Room on your right to find an Empty Fuel Can in the back corner. Next, cross the corridor into the Laundry Storage and push the white clothes cart into the Laundry Room, up against the wall with the open vent at the top. On the other side is Handgun Ammo, a Syringe, and a fuel pump you can use to make a Filled Fuel Can. Return to the Generator and insert the fuel to get it running again.


This will return power to the Elevator, which in the basement, is next to the stairwell you used to get down here. You can use it to reach floor 2F, with a cutscene upon exiting splitting James and Maria up as she needs to take a lie down. In Room C3, you'll find a Health Drink and a save point. In the Restroom you'll find Handgun Ammo, then there's another box of it in Room C2. Next, head north up the corridor and around into the more open area where you'll encounter your first nurse enemy. Once it's dead, observe the Nurses Station entrance to note down a Keypad, then pick up the Staff Memo stuck to the window.
Memo #3: Staff Memo
On floor 2F, head for the Nurses Station and look for the Staff Memo stuck to the window next to the entrance.


From the Nurses Station, turn around and head for the back-right corner of this area. There's a hidden crawlspace you can use to access Room L3, and then the Observation Room which has a Strange Photo on the desk.
Strange Photo #1: Her Drawings
On floor 2F, face the Nurses Station entrance and then turn around. In the back-right corner of this little open area is a crawlspace you can use to access Room L3. This leads to the Observation Room, which has this Strange Photo on the white desk.


Next, return to the main area and head south from this position into the Laundry Room to find Shotgun Shells and one of the Glimpses of the Past.
Glimpses of the Past #1
On floor 2F, enter the Laundry Room in the middle and interact with the bin to unlock this Glimpse of the Past.


Continue south and head into Room C1. Interact with the poster, then search it to find the Memo called Interview Transcript. Doing so marks Something There? on floor 1F of James' map.
Memo #4: Interview Transcript
In Room C1, interact with the poster on the wall, then search it to tear it down. This reveals the Interview Transcript hidden in the wall.


You can now enter the Director's Office. In here, you can make a save in the small room to the right, then there's a Hand puzzle on the desk and 3 Memos on the table to the right. You can also listen to an audio recording on the tape player next to the lit lamp.
Memo #5: Evaluation Card, Patient #0130
In the Director's Office on top of the chest of drawers in the back-right corner of the main room.


Memo #6: Evaluation Card, Patient #0090
In the Director's Office on top of the chest of drawers in the back-right corner of the main room.


Memo #7: Evaluation Card, Patient #0050
In the Director's Office on top of the chest of drawers in the back-right corner of the main room.


Also in the Director's Office is a red curtain you can pull back to reveal another Safe puzzle. As we explore Brookhaven Hospital, we'll be on the lookout for items that help us solve the two puzzles. For now, leave the Director's Office and head left to find a nurse enemy running at you. Kill it, then run to the end of the corridor and enter Room M1 for Handgun Ammo and another Glimpse of the Past.
Glimpses of the Past #2
After searching the Director's Office, exit and head left to the end of the corridor and enter Room M1. Interact with the hospital bed for this Glimpse of the Past.


Next is the Women's Locker Room, where you'll find a Health Drink, Handgun Ammo, Shotgun Shells... and a Shotgun! If you interact with the teddy bear on the chair, you'll get the Bent Needle. Leave the room and head for the Nurses' Lounge next, where on the table in front of the TV you'll find the L1 Room Key. Return to the corridor and use it to enter Room L1. Inside, push the metal cart on your right up against the open vent space above the locked door and crawl through. There's a diary entry you can read on the desk, but the main path is to the right through the window and into the Utility Room. There's a small hole in the ground that James can fit through, but during the cutscene, he falls down in between the walls and ends up on floor 1F.


When you regain control, climb through the crawlspace in the wall to enter Medical Records. In here is a Health Drink, a Memo, a Glimpse of the Past, and the Marked Bracelet for the Hand puzzle.
Memo #8: Scribbled Note
As part of the main path through Brookhaven Hospital, you'll enter Room L1 and fall down a hole in between the walls of the building in a cutscene. When you regain control and use the crawlspace, this Memo will be on your immediate left on the ground.


Glimpses of the Past #3
Immediately after picking up the Scribbled Note, follow the short path around to the typewriter and interact with it for the Glimpse of the Past.


With this room cleared, exit into the Lobby and return to floor 2F via the eastern staircase, presuming you unbolted the door previously. If not, you can use the Elevator instead. Once you're up there, you can return to the Director's Office and place the Marked Bracelet on the Hand puzzle. Next, go to the stairwell in the northwest corner of floor 2F and use it to get upstairs to floor 3F. You'll spot Laura if you look through the grate in the metal door to your right, then you can follow the corridor around to the left and into Room D2. Interact with the typewriter, then smash the glass next to Exam Room 5 back out into the corridor so you can get inside.
You can take the 1F Inner Ward Key off the desk, then head into the X-Ray Room to find the X-Ray Memo. Underneath it will be the Radiograph of a Pelvis, which for now, simply place in the X-Ray Viewer.
Memo #9: X-Ray Memo
Use the flight of stairs in the northwest corner of floor 2F to reach floor 3F, then follow the corridor around and smash the glass to enter Exam Room 5. In the room it leads to, the X-Ray Room, you'll find the X-Ray Memo.


That's all we can do up here for now, so head back down to floor 1F and use the 1F Inner Ward Key on the locked double doors in the central corridor leading off the Lobby. Start by heading left, where in the Restroom you'll find Handgun Ammo, and in the Pantry some Mold Remover. More Handgun Ammo awaits in the Cafeteria and second Restroom. With this area swept clean, return to the double doors you unlocked previously and enter the Dayroom. Defeat the nurse, then follow the path through the back and into the Pharmarcy, where you'll find a Drain you need to use an item on to get its contents. James will mark it on your map for later.


From this room, you can actually climb out an open window into the Garden, where a group of enemies needs to be defeated. When you're free of them, you can use a crawlspace behind the wooden hut to enter it to claim some Handgun Ammo and a Syringe. Just be careful, though, because there's also an enemy inside. The main path is through the Greenhouse, where an open window allows you to slip into the Pool area. From the direction you enter, there's a grate in the floor in the back right corner that's covering the Pool Pump.


We don't have the item needed right now, but head into the Shower Room to find a Medical Tube. Head through the door and cross the corridor into the Doctor's Lounge, where a Keypad Combination Note can be found pinned to a noticeboard. Around this time, Examination Room 1 should be unlocked so return there for a Strange Photo also.
Memo #10: Keypad Combination Note
Having passed through the Garden, the Greenhouse, and into the Pool area, you can cross the corridor and enter the Doctor's Lounge. This Memo is pinned to the noticeboard inside.


Strange Photo #2: At Least She Was There
As you progress through Brookhaven Hospital, the Examination Room 1 will eventually be unlocked. Keep checking it, and when it's open, interact with the drawer on the back wall to find this Strange Photo inside.


This Memo tells you how to get the Nurses Station Keypad Code, but if you need any further assistance working out, please click below:
Where to find the Nurses Station Keypad code
Once inside the Nurses Station, grab the Handgun Ammo on the left and enter the Treatment Room. There's a Memo for the Treatment Room Note on the left, then approach the bathtub surrounded by bugs to find the Moldy Radiograph. In your inventory, combine the Moldy Radiograph with the Mold Remover to get the Cleaned Up Radiograph.
Memo #11: Treatment Room Note
Having found the Keypad Combination Note, put it to use at the Nurses Station Keypad and enter the Treatment Room. This Memo is on your right as you enter.


Now you have the Cleaned Up Radiograph, you can return to the X-Ray Viewer in the X-Ray Room on floor 3F and finish the puzzle. For further guidance to help you solve it, click below:
Where to place all Radiographs
Solving the X-Ray Viewer puzzle provides you with the code for the Combination Lock code for Room D1:
- Right 4, Left 37, Right 12


Take this back to the Director's Office on floor 2F, as you can now solve the Hand puzzle. Refer to the page below for the solution:
Where to place Bracelets on the Hand
Your reward for solving the Hand puzzle is the Director's Storage Room Key, which can be used on the door opposite the save point in the Director's Office. In here, you'll find the Safe Button and a series of books you'll need to correctly order. For guidance on this Safe puzzle, please click below:
Where to find the Safe Button
For opening the Safe in the Director's Office, you'll earn the Rooftop Key. There's also a Memo called Safe Note in there too.
Memo #12: Safe Note
Having opened the Safe in the Director's Office, you'll get the Rooftop Key and this Memo.


From the Director's Office, you can access the Rooftop by climbing the stairwell in the northwest corner of floor 2F and then following the single corridor on floor 3F around to the right-hand corner. Use the Rooftop Key and exit out on the roof, where you can find Shotgun Shells and another Glimpse of the Past.
Glimpses of the Past #4
When you use the Rooftop Key to access the roof, head out onto it and look for the small staircase opposite the set of double doors with light pouring out the windows. Follow this path to the left, and at the end will be the Glimpse of the Past.

Go through the double doors with light pouring out its windows and pick up the Page From a Diary off the floor for another Memo.
Memo #13: Page From a Diary
When you're on the roof, enter the small room with light pouring out through its entrance doors to find the Page From a Diary on the ground.

When you try to go back outside, Pyramid Head will surprise James and throw him through the floorboards. The action picks back up with James on floor 3F, on the other side of the locked, metal door we last saw Laura. You can hear her humming, so head down the corridor into the Hydrotherapy Room to find Handgun Ammo, Shotgun Shells, a Health Drink, and a Syringe. You can also unlock the other door so you have an easy way to get back to the rest of Brookhaven Hospital.


Return to the corridor you just gained access to and follow it into Room 13. Interact with the bloodstain in the left-hand corner for another of the Glimpses of the Past.
Glimpses of the Past #5
After Pyramid Head throws you through the floorboard from the Rooftop, you'll gain access to a new part of floor 3F. Follow the corridor round into Room 13 and interact with the bloodstain for this Glimpse of the Past.


Return to the corridor and follow it around to find Laura. In the cutscene that follows, she lures James into a room with a boss fight inside, against the Flesh Lip. This mound of flesh will attack from the ceiling, launching itself down at you from the rafters. You can tell roughly where it is from the rumblings, creaks, and dust it produces as it moves about from the ceiling.
As you shoot and damage it, the cage surrounding the Flesh Lip will start to break. Once 3 of its sides have started protruding like pincers, it'll drop down to your level for the rest of the fight. Continue blasting it with your guns and it'll eventually die. There are some Ammo and Health Drinks around the sides of the room if you need any extra help. The Flesh Lip will die and then a cutscene follows, but it turns out there was a second Flesh Lip hiding all along. It grabs James and transports him to the Otherworld version of Brookhaven Hospital.


If you open up your map once you have control of James, you'll notice this Otherworld version features the exact same rooms and layout as the normal one, but your map has been wiped clean and everything looks even dirtier than before. Enter the Dayroom and pick the Memo up, known as Evaluation Card, Patient #3141, off the wheelchair.
Memo #14: Evaluation Card, Patient #3141
After fighting the Flesh Lip, you'll be transported to the Otherworld version of Brookhaven Hospital. Pick this Memo up off the wheelchair in front of you once you regain control.


There's also a Syringe and Handgun Ammo in this room, then you can leave by the door left ajar. Save your game on the left, then use the Elevator to reach floor 2F, as everything else is either locked or inaccessible from your position. In the open area ahead, you'll discover the Chained Box, which forms a large puzzle for the Otherworld version of Brookhaven Hospital. It has 3 requirements: a combination lock code, a keypad code, and a key. There's clearly a lot to this puzzle, so let's begin by searching the left-hand side of floor 2F.
Cut through the Nurses' Station to find Handgun Ammo and Shotgun Shells, then in the Nurses' Lounge you'll find more of the latter along with a Health Drink. On the far side of this room, you'll notice an overflowing toilet. To the right of it is a crawlspace you can use to access the Women's Locker Room, which houses more of the usual ammo and health supplies.


Return to the corridor by unlocking the door and take the stairwell it leads to up to floor 3F, where a Memo can be found on the operating table in the X-Ray Room, called The Procedure.
Memo #15: The Procedure
From the Chained Box on floor 2F, explore the left-hand side of the map and take the stairwell up to floor 3F. You'll find this Memo on the operating table in the X-Ray Room.


In Exam Room 4, take the Instrument of Force and use it on the mannequin's left arm next to it. Climb through the window and kill the 2 enemies found in the corridor, then head for where there should be a stairwell in the northwest corner. There isn't actually one there, but if you look at the northern wall of Room D2 from the outside, you'll find a place to break the wall down so you can enter.


In Room D1, you'll find a ladder you can use to head down into the Kitchen on floor 1F. You'll find the normal ammo and health supplies in here and the Restroom to the north, though the main route ahead is through the Storage and Medical Records area to access a gap in the wall you can fit through in the back. There's a small hole in the wall in the room on the other side, with the Key of Bliss inside. This can be used on the mannequin on floor 2F that James has marked on his map as Surgical Chair. Return to the Kitchen and take the ladder back up to use it and you'll get the Lapis Eye Key in return.


This can be used on the central keyhole on the Chained Box, but Note: inserting the key blocks your access to the area you've just searched. You can't return, so be sure you've found all the items and Memos first.
Now, we're going to explore the rest of floor 2F. Heading right, you'll find ammo and health supplies in the Restroom and Room C2 (everywhere else is locked or blocked off). Now return to the Chained Box and head directly south into the Restroom to find a metal cart you can use to climb into Room L1. You'll find further ammo supplies in here. When you're ready, climb out the window on the room's western side and cross into Room M1 to find a clock. You can interact with it to straighten the hand, and now we need to work out what number it should point to.


For now, head into Room M4 and cut through the hole in the wall into Room M5 to find a Glimpse of the Past on the eastern wall.
Glimpses of the Past #6
From the Chained Box on floor 2F, head south through the Restroom and climb onto the metal cart to access Room L1. You can then follow the corridor around into Room M4 and use the hole in the wall to access Room M5. On the eastern wall is this Glimpse of the Past.


Head back into Room M3, where a breakable wall allows you access to Room M2. In here, you'll work out the Combination Lock code for the Chained Box. Grab the Memo in the tent for the Calendar Page.
Memo #16: Calendar Page
From the Chained Box on floor 2F, head south and into the Restroom to use the metal cart to climb into Room L1. Pass through into the corridor, then use the breakable wall in Room M3 to access Room M2. In the tent will be the Calendar Page, which helps you work out the Combination Lock code for the Chained Box puzzle.


For information relating to what to do in this room to get the Combination Lock code, click below:
A complete guide to the Chained Box puzzle
Now the Combination Lock is gone, there's just one more step to unlocking the Chained Box. Please note that just like with the Lapis Eye Key, the area you explored to get the Combination Lock code is now inaccessible.
Next up, follow the east corridor all the way around to the Director's Office. You'll notice it's locked and we don't have the key yet, but turn around and you'll spot a breakable wall leading into the Laundry Room. Smash your way inside, defeat the enemies and pick up the ammo and health supplies, then push the cupboard on the northern wall to one side. Doing so allows you to push the metal cart on your left out into the corridor and up against the wall. There's a crawlspace high up you can access opposite Room L2 to enter Room L3.


Defeat the 3 enemies inside, then go through to the Observation Room to find a Memo on the bed to your immediate left. Then, in the bedroom in the back in the bedside cabinet is a Strange Photo.
Memo #17: Patient's Note
Break apart the wall opposite the Director's Office, then push the metal cart found inside up against the high crawlspace leading into Room L3. Next door is the Observation Room, with this Memo on your immediate left as you enter.


Strange Photo #3: No One Knows
In the Observation Room, you'll find this Strange Photo in the bedside cabinet in the room in the back.


Now you have those Collectibles, approach the static TV in the Observation Room to find the Director's Office Key in front of it. Exit out into the corridor and use the key to enter the Otherworld version of the Director's Office. You'll find Shotgun Shells and a Health Drink in the small room on the left, then to the right of the ladder in the center is a Memo called Manic Scribble.
Memo #18: Manic Scribble
Having got the Director's Office Key from the Observation Room, unlock the door and grab this Memo to the right of the ladder.


Climb the ladder up to Room 17 on floor 3F, which features a Treatment Stretcher. You can't do anything with it just yet, so search the room for supplies and then grab the Memo in the back-right corner.
Memo #19: Nurse's Note
Climb the ladder in the Director's Office to reach Room 17 on floor 3F, where you'll find this Memo in the back-right corner.


Enter the corridor and defeat the enemies you find, following the red wire along the ground to a crack in the wall you can squeeze through. Turn the Generator in the bathroom on, then squeeze through the crawlspace opposite so you can quickly get back to the Treatment Stretcher. In this area, you can also crawl through a hole to grab a Memo. Turn it on and the code 9659 will appear. This is the Keypad code for the Chained Box, so return there and enter it.
Memo #20: Director's Note
When you follow the red cable to the Generator and turn it on, use the nearby hole in the floor to crawl through to a Restroom containing this Memo.


James will open the Chained Box to discover there's nothing inside. However, this triggers the reveal of a portrait/statue of a woman. James takes something from her mouth, which turns out to be the -1 Elevator Button. Again, the area you were exploring previously has been blocked off, so the only thing you can do now is interact with the Elevator and place the -1 Elevator Button in the panel. Press it and head down, listening carefully to the announcer who comes on the radio. They ask you 3 questions, and while you can't answer right now, they're important for an optional puzzle later on.
When you reach the Basement, search the Kitchen Disposal Room for some ammo and health supplies, then head east into the Maintenance Room to squeeze through a gap in the wall into the Generator Room. You can head through Laundry Storage next for some Handgun Ammo (beware the enemy hiding to the right), then cut through the dedicated Laundry Room and Storage area to reach the southern end of the corridor.


Through the 2 Boiler Rooms you can go next, where in the second will be a raised open vent you can climb through to reach the Pump Room. By the hole in the wall on the table, pick up the Copper Ring. Doing so sees Maria appear, who isn't in the best of moods. She'll now join you in your search for Laura through Brookhaven Hospital. Head down the corridor and take the staircase up to floor 1F, where in Exam Room 3 you can grab a Syringe and exit out into the corridor.


All the doors are locked, so enjoy the rain and enter the Pool area, with there being a Strange Photo in the back-right corner as you enter.
Strange Photo #4: They Mustn't Know
When you meet up with Maria, enter the Pool area on floor 1F, and from the direction you enter, the Strange Photo will be in the back-right corner next to a life ring.


Head south into the Doctors' Lounge, where in a cutscene James and Maria will open a fridge to find the Lead Ring. Having regained control, use the door to your right to enter the Locker Room, where on the bench will be the Dissociated Note.
Memo 21: Dissociated Note
After the cutscene in the Doctor's Lounge that gives you the Lead Ring, head into the Locker Room next door and pick this Memo up off the bench.


Unbolt the door, save your game, and enter the Pharmacy to find the Decorative Box. Do you remember the questions we were asked earlier in the Elevator by the radio announcer? Here's where you input your answers. For help solving the Decorative Box puzzle, click the link below:
What's the Decorative Box code solution?
Once you've opened it and claimed your reward, head back out into the corridor and call the Elevator to take it up to floor 2F. Approach the painting/statue opposite where the Chained Box was and place the Copper Ring and Lead Ring on it. It'll turn into a door and swing open, allowing James and Maria to pass through. On the floor will be the Ominous Note.
Memo #22: Ominous Note
After putting the Copper Ring and Lead ring on the portrait/statue, this Memo will be on the staircase up ahead.


At the very bottom of the stairs, you'll enter a red-lit corridor and Pyramid Head will chase you. Sprint away and head for the elevator at the end of the corridor. Unfortunately, however, there's a casualty: Maria is stabbed by Pyramid Head and doesn't make it. When you regain control of James, go into the Reception Office to find the Hospital Entrance Key on top of a book. James will then spot Laura running away outside, so give chase by unlocking the front double doors and heading out into the rain.


As you leave, you'll be greeted by an Otherworld version of South Vale. The path through West South Vale is entirely linear and is more of a combat challenge than anything else, pitting you against multiple groups of enemies as you explore its significantly darker streets. When you reach East South Vale, enter the campervan to save your game and pick up the Memo on your right. This marks a "Letter and Wrench" hint on your map at the American Cafe.
Memo #23: Note on a Map
When you leave Brookhaven Hospital and make it to East South Vale in its Otherworld form, enter the campervan on the right to find this Memo on the table.


You can cross the chasm in the road through Happy Burger, then in Neely's Bar, there's a Glimpse of the Past on the bar and a path through to the other side of the area. Again, this path is completely linear so follow it to the question mark on your map, where a public phone will be ringing. There's nobody on the other end, but a Memo does appear when James puts the phone down. Also on the public phone is the Wrench. Afterwards, head to the Lucky Jade Restaurant and smash the window of the car on its driver's seat outside to find a Strange Photo.
Glimpses of the Past #7
When you reach Neely's Bar in the Otherworld, interact with the map on the bar for this Glimpse of the Past.


Memo #24: Letter
When you pick up the ringing phone outside the American Cafe, James will receive the Memo automatically in a little cutscene.


Strange Photo #5: They're Here
When you reach Katz Street, where there's a ringing telephone, head to the Lucky Jade Restaurant. There's a car parked outside, and smashing the driver's window will reveal a Strange Photo.


Next, head north up Neely Street and use the Wrench on the gate next to the save point to pass through. Follow the long dark tunnel into Rosewater Park, where you'll need to find a path through to the other side — where the circle on your map is essentially. There, you'll encounter Angela again. After the cutscene, use the interactive prompt at the foot of the statue to get the Historical Society Key from a metal box. Leave Rosewater Park and head west up Nathan Avenue to find the Silent Hill Historical Society. Use the key to unlock the front door and head inside, where our Silent Hill 2 Walkthrough continues. On your way there, though, head to Room 106 at Jacks Inn and interact with the prompt on the back wall for a Trophy.


Did you find our Walkthrough covering Brookhaven Hospital in Silent Hill 2 and all its Collectibles useful? Our Silent Hill 2 Walkthrough continues in our Historical Society Walkthrough, and we have even more guidance and information in our overall Silent Hill 2 guide.